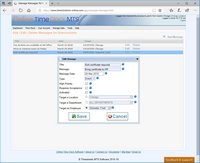
Message Information
The add / edit message screen allows you to add a new message or edit an existing one as well as adjust the various settings that each message allows.
| Setting | Description |
| Message Title | The title for the message. Shown to employees in the fixed time clock message list box or on the employee pop-up message list box. |
| Message | The message text. Displayed to employees in a pop-up window when they select the View link from the message lists. |
| Message Date | Messages are displayed descending date order, so set the message date appropriately to have new messages displayed first to employees in message lists. |
| Message Type | Fixed messages are shown to employees on the Employee Time Clock screen on the bottom right. Event messages are shown to employees when they clock in and out. Fixed messages can only be targeted at locations, while Event messages can be targeted at departments and employees. |
| High Priority | Check this box to have messages displayed higher up in message lists and with bold text. |
| Requires Acceptance | Check this box to require employees to press an 'Acceptance' button when they view the message. This acceptance is recorded and can be reported on via the Message Acceptance Report. Note that only Event messages can require employee acceptance. |
| Activated | Check this box to have the message displayed to employees. Non-activated messages will not be shown to employees. |
| Target a Location | Select this option and a location from the dropdown to target this message at all employees from a location. The Account Administrator can target messages at all locations (that is all Online Time Clock MTS employees). |
| Target a Department | Check this box and select a department from the dropdown to target a message at all employees from a department. |
| Target an Employee | Check this box and select an employee from the dropdown to target an employee at a single employee. |
This page last modified : 15:52:57 30 Mar 2011


